Insight into the magnetic particle or magnetic particle inspection MT
News:
All products made into the industrial field, whether made by metal (stainless steel, cast iron etc.) Or by synthetic material (plastic, rubber etc.) may contain inside or on the surface some discontinuities that may be of several types (cracks , porosity, inclusions, etc.) and shapes (round, elongated, planar, volumetric). These irregularities may have metallurgical or processing causes and can already exist at the startup of the component or to be a result of the practice. It is important to monitor these discontinuities because in the short or in the long run they could lead to possible malfunctions of the objects themselves.
· they do not require the destruction of samples derived from the structure under control;
· these are not invasive tests;
· they are also practicable if a component is in service.
Punto Netto performs preliminary and maintenance non-destructive testing.
Controls are currently carried out on:
· raw, finished or semi-finished components (castings, forgings, molded, tanks, cylinders, mechanical components, etc.);
· systems and complex works (pipelines, water / gas networks, carpentry structures, process and power stations etc.).
Punto Netto has a certified to Level 2 staff according to EN ISO 9712 for Non-destructive testing with Penetrating liquids, Magnetic Particle and Ultrasound.
The magnetic particle inspection (MT) is a non-destructive technique that is based on the analysis of changes in the magnetic field occurring in presence of surface or sub-surface discontinuities. It can only be applied to iron-magnetic materials or materials that can be magnetized. All materials that possess a significant percentage of iron, nickel or cobalt are iron-magnetic. Iron-magnetic materials are constituted by several areas (called magnetic domains) in which the magnetic fields of the individual atoms are to be aligned; when the material is in a demagnetized state each domain is oriented randomly, but under the action of a power or an external magnetic field, the domains align themselves giving rise to a macroscopic magnetization of the entire body. To perform a magnetic particle is essential the presence of:
· Particles of magnetized metal;
· A magnetic field;
The presence of the discontinuity causes a "break" of the natural magnetic field of the piece, and the particles of the magnetized metal cluster in correspondence of the discontinuity that acts as an additional magnetic dipole. In order to have a significant alteration of the magnetic field is necessary that the discontinuity is as perpendicular as possible to the induction lines so as to provide an abrupt change of permeability. If the discontinuity lies on a plane parallel to the lines of induction it produces no accumulation. However the detection of the discontinuity occurs up to angles between 40 and 60 ° with respect to the lines of induction. MT control is generally divided into 5 phases:
1. Surface preparation;
At this early stage it is important to verify that the surface of the part to be tested is free from grease, oil, dust and other foreign matter that could interfere with the control itself. The presence of contaminants may obstruct (or even prevent) the movement of the magnetic particles under the action of the external field, making difficult the visualization of defects in this way. In fact oil and grease lessen the attraction of the particles by the external field and alter their accumulation producing false indications.
2. Magnetization of the surface
At this stage we proceed to the application of the magnetic field on the surface of the workpiece. Electrical system: it produces the magnetization of the piece by passage of power on the part. Magnetic system: it produces the magnetization of the piece by immersion into a magnetic field. The equipment which is most used to make a control MT is the magnetic yoke (permanent magnet or electromagnet) and the direction of magnetization must be > 45° compared to that of the awaited discontinuities. The technique that makes use of these devices produces a localized longitudinal magnetization. The induction lines are produced near the poles of the magnet or the electromagnet. Both in the permanent magnets and electromagnets the polar expansions are flexible to allow greater adaptability to the particular geometric configuration of the piece.
3. Application of the magnetic powder
The test with magnetic particles can be performed in two ways: Exam with direct magnetization, where the application of the detector takes place together with the magnetization of the piece (or immediately before). The observation of the display and the application of the detector are simultaneous. Exam with residual magnetization, where the detector is applied after that the operation of magnetization has ceased, exploiting the residual magnetism of the piece. we can have two different methods to do the exam depending on the magnetic particles that are used: the dry method and the wet method. In the first case we have iron particles which are finely divided and coated by pigments. The powder is applied by sprinkling or blowing it on the component to be tested. The particle size is carefully selected because, although the finest particles are more sensitive, it is not possible to use only this type as they adhere to any kind of discontinuity (fingerprints, traces of oil, roughness) and so they should produce a too “dense” substratum. Also the shape is important: the more "stretched" particles are easily attracted to scattered fields, but tend to become opaque and grouped in clusters. Even the color of the pigments which are coated with the particles is important as a function of the appearance of the surface of the component.
In the wet method the sensitive particles are mixed with a liquid (water, light oil or kerosene) and then are sprayed onto the surface of the component. The oily substance is preferred when it is essential to ensure the absence of corrosive effects, when the water could manifest electrical problems and on high strength alloys where the hydrogen atoms of the water may spread in the crystal structure generating embrittlement. The particle size is usually finer than the dry method ones (5-15 mm) and the shape is compact. Pigments are not generally added, so the mobility is greater than the dry method ones. The wet method is used where it prefers the sensitivity rather than the visibility. Colored powders: the perceptibility of directions depends on the difference between their color and that of the test piece, so you will have powders suitable for the surface of the piece to be examined (ocher for burnished surfaces, black for the adjusted ones, blue for the oxidized ones etc.). Fluorescent powders: they consist of very fine magnetic particles coated with fluorescent pigments.
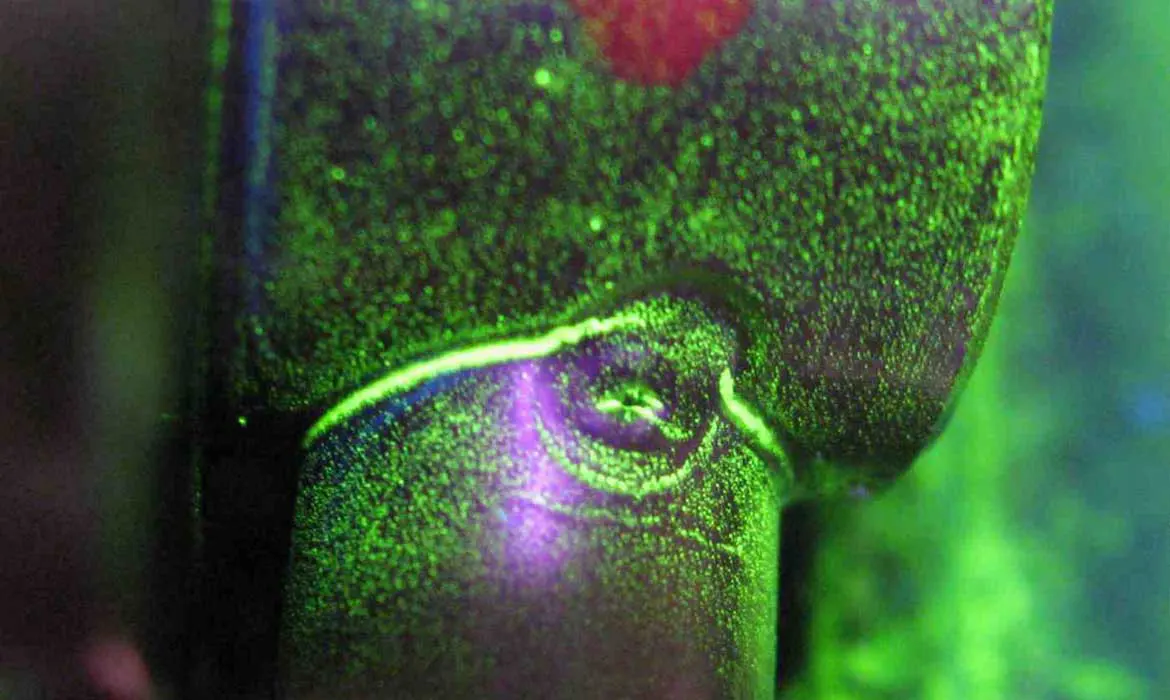
4. Illumination and inspection of the surfaceYou must have a good level of lighting (at least 1000 lux) Filament lamps (min 80 W at 1 m), fluorescent lamps (80 W min to 1 m) and "black light" lamps (fluorescent powders).
During the inspection of the surface it is necessary to know that:
· The surface defects tend to provide sharp, narrow and well-defined indications with particles well-linked to each other;
· The sub-surface defects provide wider and more blurred indications;
· Not relevant Information: edges or variations section, points of union between different materials, contours of the weld seams (HAZ), machining, air gap in the presence of press fits.
5. Demagnetization of the item (optional)
The magnetic particle test can leave a residual magnetic field on the piece, which can potentially interfere with his duties or the subsequent processing which must be submitted. To return the piece to its original condition it is necessary to apply a magnetic field of reverse polarity to the previous and gradually decreasing intensity.
Possible reasons why it is necessary demagnetization:
· Interference with other technological processes (welding, machining);
· Interference with measuring instruments that are placed close to the component;
· Metallic abrasive particles can be attracted to the component and can cause (or be a factor of acceleration) phenomena of surface damage.
The assessment of the sensitivity of the equipment that is used for a MT test (electrical instrumentation + powder) is usually evaluated by employing the so-called field indicators: ie instruments that measure the relative intensity of the stray magnetic fields and which act as calibrators of the system. There are different types of indicators (the Ketos ring, octagonal plates, indicators of artificial defects AFI, etc.).
Some advantages and some limitations of the magnetic particle method are listed below.
Benefits:
· It can detect surface and sub-surface discontinuities that cannot be visually identified;
· It does not require a special surface preparation;
· Coated surfaces (0.1 mm) can be examined;
· Dimensions and configuration component does not usually limit the exam;
· The exam is quick and simple;
· The equipment can be portable;
· "Direct" indications are produced;
· The need for a post-cleaning inspection is minimal;
Limits:
· It can be used only on iron-magnetic materials;
· The sensitivity detection decreases with the increase of the depth of the defect;
· The orientation of the magnetic field relative to the direction of the discontinuity is a critical factor;
· For some techniques you need a good electrical contact;
· An incorrect operating technique can lead to overheating and triggering of arc;
· Demagnetization may be required;
· The Punto Netto LTD of Griso Gaetano LTD overcomes these inherent limitations of the method as it has the ability to offer its customers technical assistance in selecting the non-destructive method that best suits the component to be analyzed, be it raw, semi-finished or finished, and that better meets the needs of its customers. If you are interested, please contact us: you will find that Punto Netto is a great partner with the right skills at the right price!


 Among the many services provided by Equity Point stand out the non-destructive testing, with Penetrating liquids, Ultrasound and Magnetic Particle.


